
 Galaxy Forms Support
Appearance
Adding and Editing PDF Elements
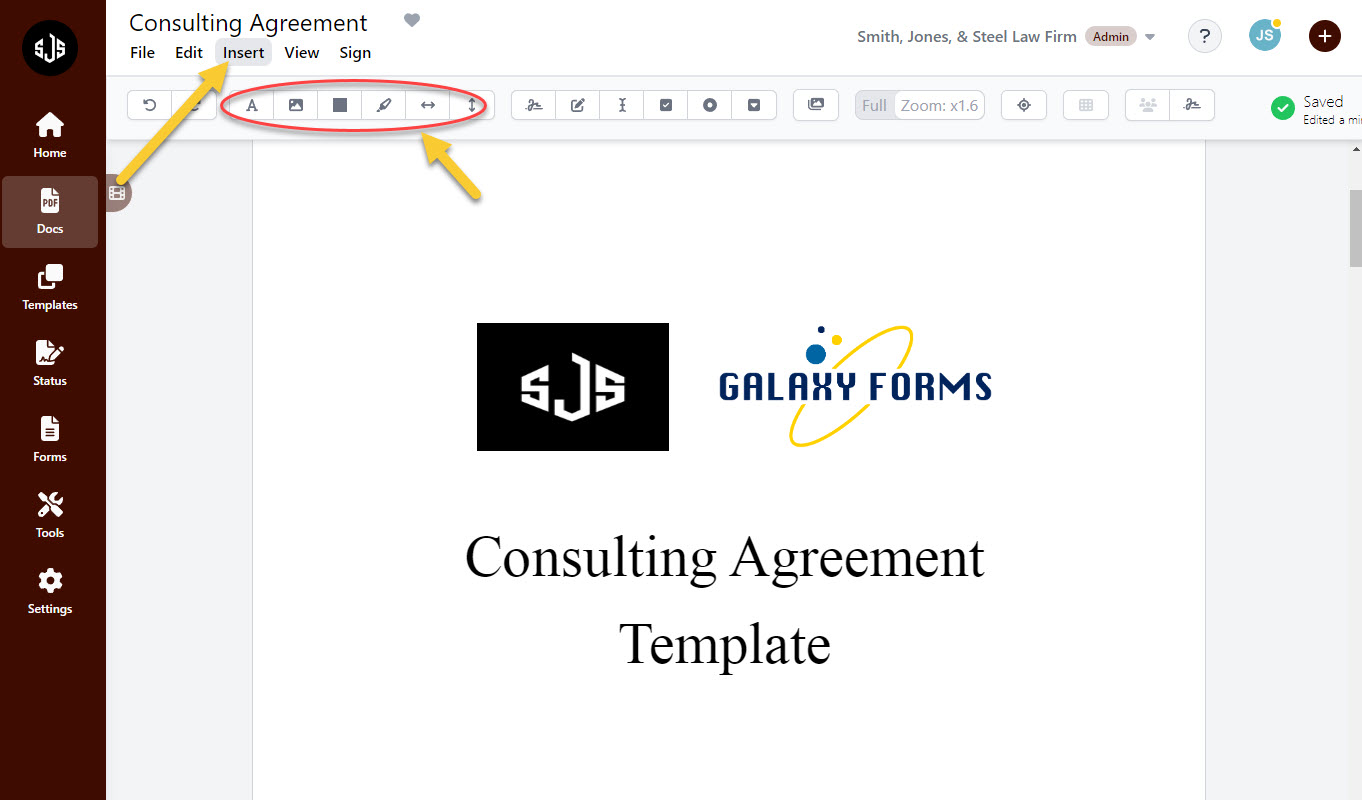
Adding an Element to a PDF
To add an element to the PDF, click on ‘Insert’ on the main menu or choose from any of the shortcuts icons on the menu bar. Once an element has been selected, click on the document to place it, or hold your click and drag to make the element fill in the desired space on the page
Editing PDF Elements
Once the element has been added to the document, a border will appear around the element, and the right panel of the page will show the details of the element as well as allow changes to be made
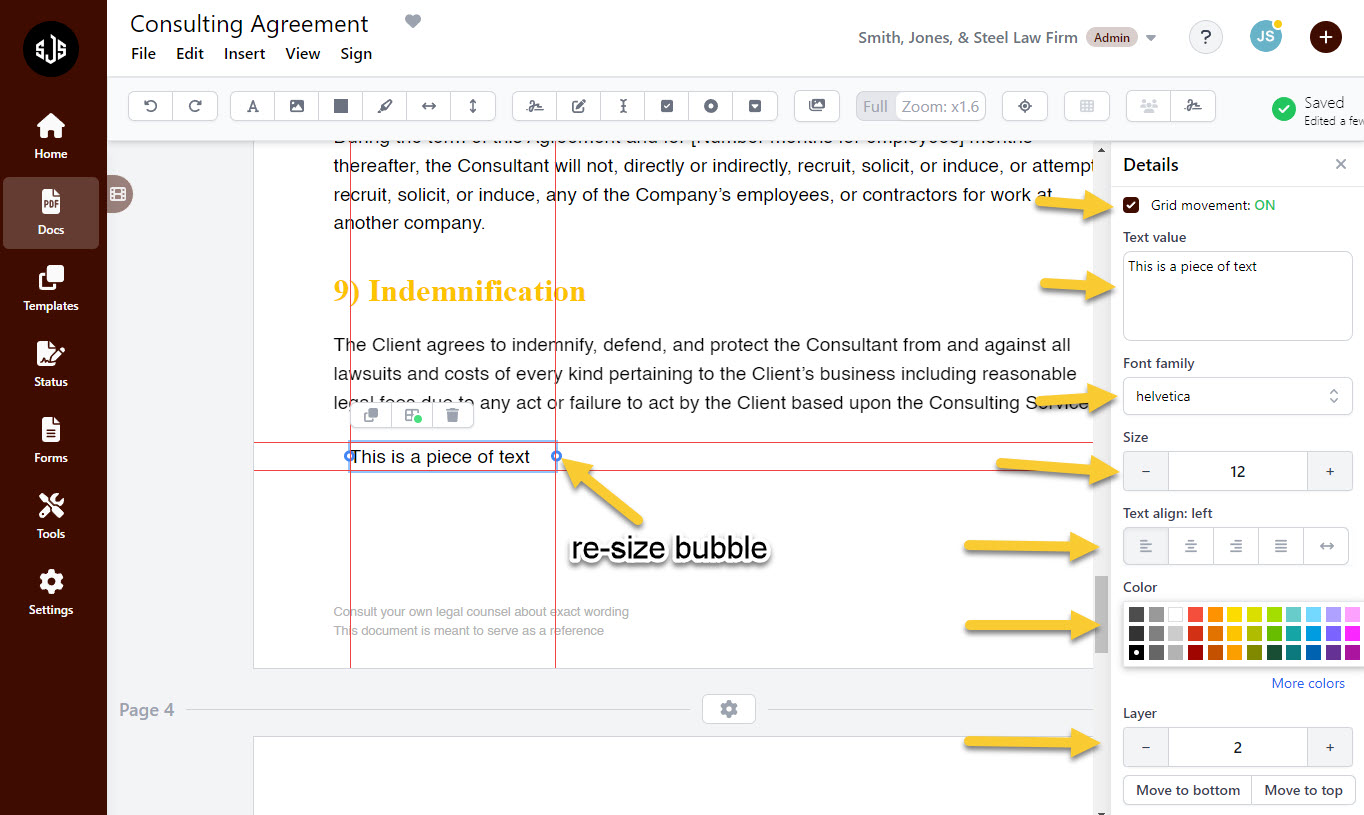
Depending on what element that has been added to the page, the right panel will show different components for that element. In this above screenshot, the “Text” element has been added to the page, and it is very easy to make changes. For text, changes can be made to the value, font, font size, alignment, color, and what desired layer of the page the text will occupy. Elements can be re-sized with the blue circles on the border edge, and a user can also select whether or the element should be constricted to the grid.
The Grid
With the grid ON the elements have more of a “snap” feel because they are conforming to a grid pattern. This makes it easier to get elements to line up with each other and keep documents looking clean.
With the grid OFF elements have a more “free flowing” feel because they are not restricted to any grid parameters.
Our recommendation is that when creating new PDF documents from within Galaxy Forms, the grid should be ON, but when editing existing PDFs that have been uploaded it is likely a better option to keep the grid OFF.